PART 1 OF THE SERIES: THE MINUTEMAN HF MICRO KIT “A LOW COST DIGITAL SYSTEM THAT GETS THE MESSAGE THROUGH”
Something that a lot of HAMs do not consider is the question of “how do I reinstall from scratch, OFFLINE, my HAM Shack laptop used for digital modes use?”
We forget that the internet and all the help articles you can imagine, might not always be available. Can you even picture a time when you can’t ask “Siri, what is the key combination to reach a Dell laptop BIOS on boot up?”, you should!
Without a computer, there is no communicating via digital modes! It’s just as important as the HF rig when using digital, and both should have redundancy, meaning two HF rigs and two laptops to go with them.
“TWO IS ONE, ONE IS NONE!”
Is never more true than when it comes to comms equipment. It just doesn’t lend itself to baling wire and duct tape repairs all that well. There is no denying that HF gear is expensive for the most part, but the radio I have selected for this build, the tr(uSDX), delivers SO MUCH for such a small price that buying two transceivers and all the support gear (laptop, sound card, etc) can be done for less than the cost of a traditional rig.
So the next time you buy ANOTHER $1000 rifle or toy, think about what you could have had for half the money… A system that allows “texting” over the airwaves 30-2000 miles away without ANY infrastructure required!
WHATS THE ADDED VALUE?
The average dude doesn’t typically see the value of this kind of ability.
These days with cellphones and instant information of the internet always at their fingertips, our “normalcy bias” doesn’t allow us to entertain the thought of “NO INTERNET?!!” [insert Psycho shower scene music here], but try going a week without ANY information when you know your family is in an affected area.
The peace of mind of knowing your people are OK is a huge mental relief when there is no news coming out of the area. Or in the worst case scenario, there is no news coming out of ANY AREA in the USA.
When the worst happens, HF radio will be the only way to communicate outside your immediate area. It will be the only way to know what is going on outside of the limited (typically 2-50 mile) VHF/UHF range!
Now the point can easily be made, and is true, that having a SSB Shortwave receiver for less than $100.00 will get you the same information (if you know how to make an effective antenna) and that might be the path for you if you are not wanting to learn HAM radio. Nothing wrong with that, while I don’t own one, the CountyComm GP-7 SSB comes highly recommended if that’s the path you want to take.
If you want to learn how to make contacts across the nation on 5 watts and be able to pass “traffic” back and forth, then stick around!
As stated in the first post of the series: THE MINUTEMAN HF MICRO KIT A LOW COST DIGITAL SYSTEM THAT GETS THE MESSAGE THROUGH
The equipment list for this build starts with a $98.00 Win10 Laptop, the EVOLVE III MAESTRO.
The version listed on the PNW Build List shows a USB version in the images, but reading the text you see only (2) USB ports listed and that it’s a 2021 model, and on delivery it was a 12VDC model that I got.
The earlier models use a standard 12VDC input instead of a 5V USB charging scheme which is much preferred in my mind as all things HAM are powered by 12VDC usually.
SETTING UP THE EVOLVE III MAESTRO
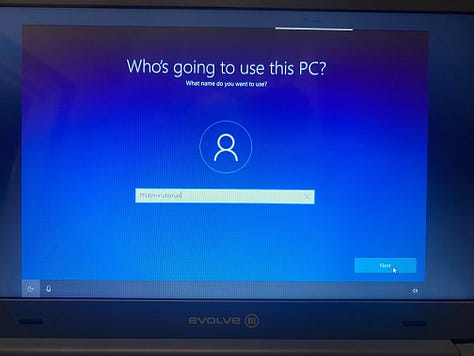
When you first power up the Evolve iii Maestro it walks you through the process of installing it’s Education version of Windows 10 Pro.
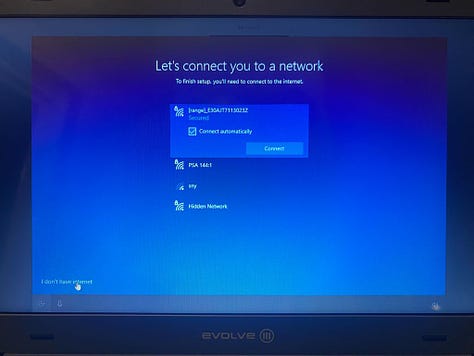
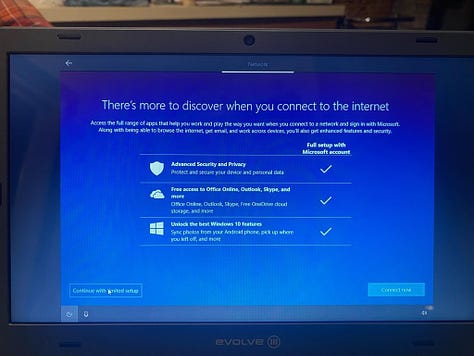
The most critical part during the initial and any subsequent installs, is to NEVER CONNECT TO THE INTERNET with the laptop.
Doing so will not allow you to create a local account and the setup process will demand a Microsoft account be created, not something we want for our purposes.
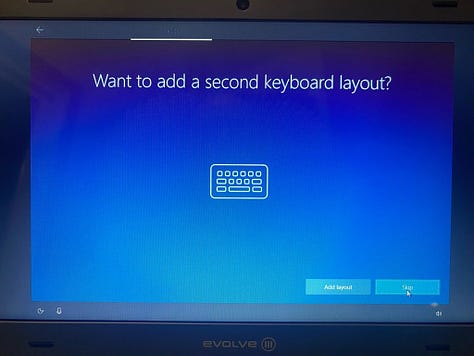
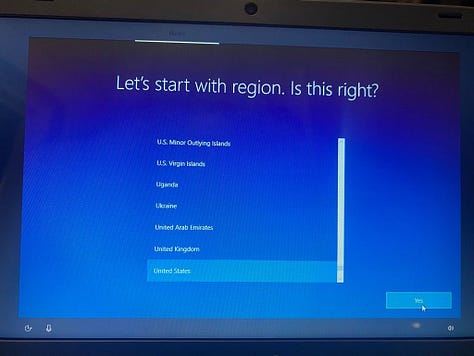
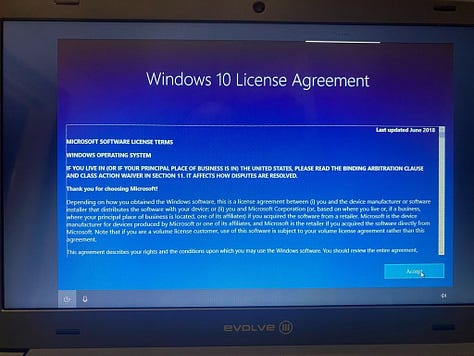
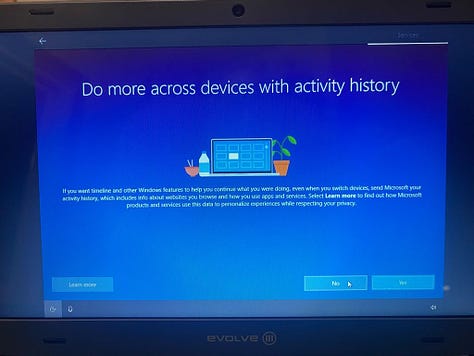
The process asks you the same question twice in a row, read and click correctly or you will have to start all over when you are done.
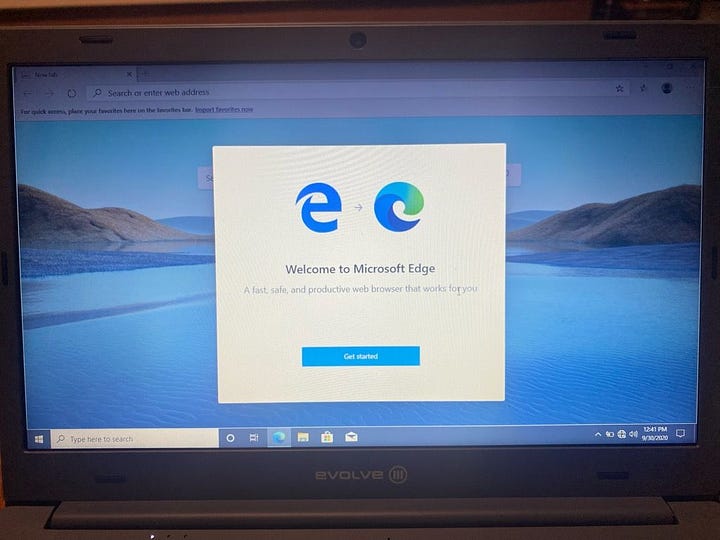
I’ve included slides of initial setup the process you will go through on power up in the gallery below, they are in order.



I’ve never used the “Education” version so I can not tell you the difference but according to the first page I searched (https://computerinfobits.com/windows-10-education-vs-pro/) it looks like a good fit for our purpose of an OFFLINE radio computer. It leaves out a lot of “bloatware” and we will be removing more later with an very nicely written script called WIN11Debloater in another post.
NOW DELETE EVERYTHING AND DO IT AGAIN!
ARE YOU “CRAY CRAY?”
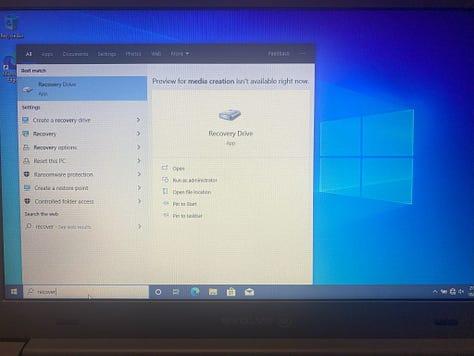
Yea, now we are going to make sure that we can restore the computer OFFLINE with a “recovery disk” created with the onboard Media Creation Tool that will make a bootable USB drive with a full install of your exact version of Win10 that the laptop shipped with.
Below is the process in screenshots. This is time consuming so expect hours to complete the process. Always have the laptop plugged in and charging and someplace where the keys can not be walked on by your cat!!!
In the search box, type “recover” and select the Recovery Media Creator option.
Run this program to make a backup of the existing install. You will need a USB drive of 8GB or better INSTALLED when you start the program.
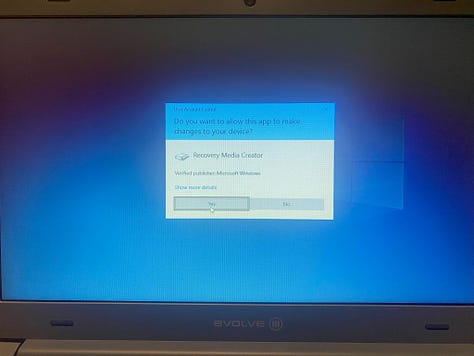
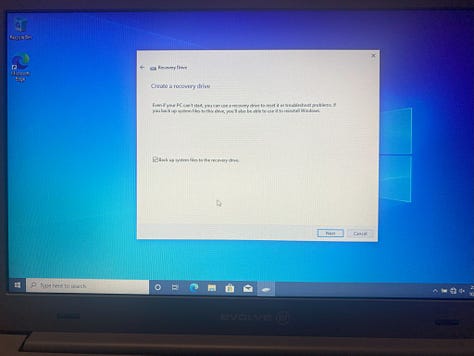
By now you should have a bootable USB drive with your backup, but to test if it works you need to change the boot order on the laptop by going into the BIOS at startup.
To access the BIOS, tap the DELETE key every second while booting the laptop. Follow the slides below to make the laptop boot from the USB port before the hard drive in the future.
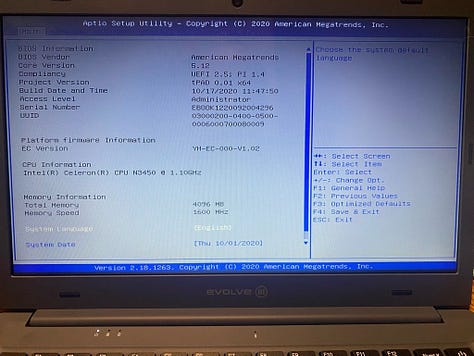

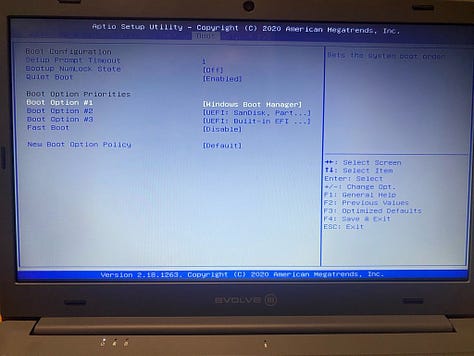
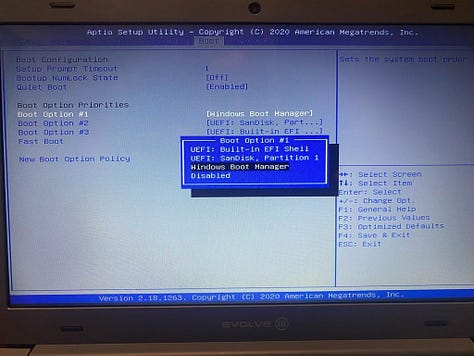
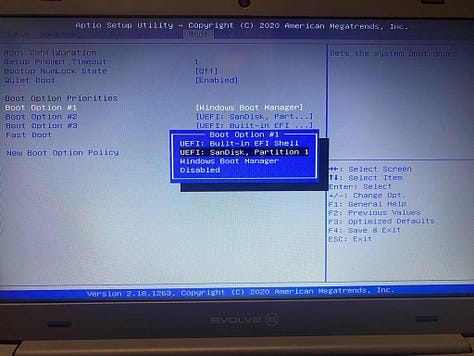
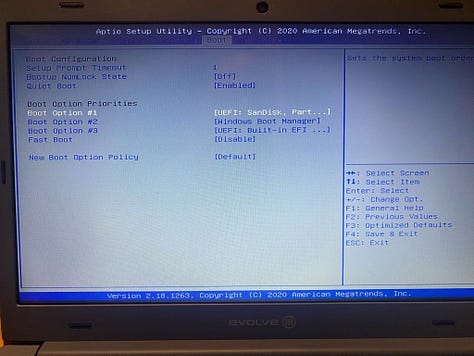
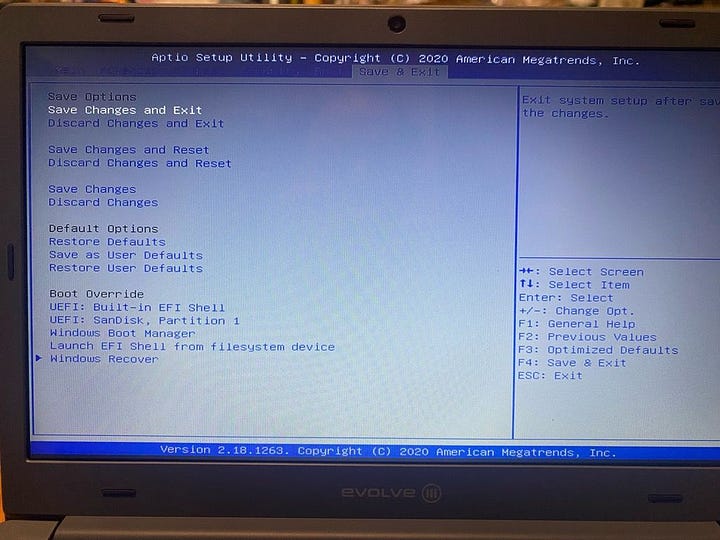
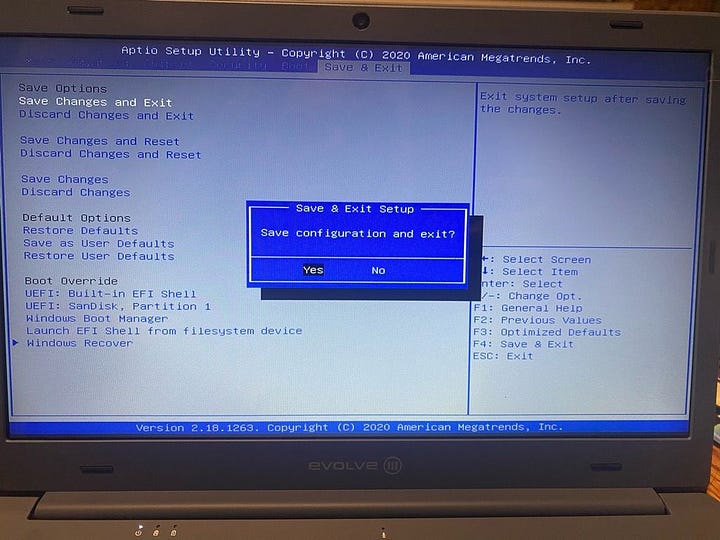
BACKING UP THE EVOLVE III MAESTRO
If you are using something other than the Evolve iii Maestro, you might be able to make do with this procedure (hint: BIOS keys are usually F2, F4, F10, F12) but there is a potential for individual hardware to require additional specific files (like on my Surface GO2) that require extra attention so I will not be covering anything but the Evolve iii Maestro in the backup portion below.
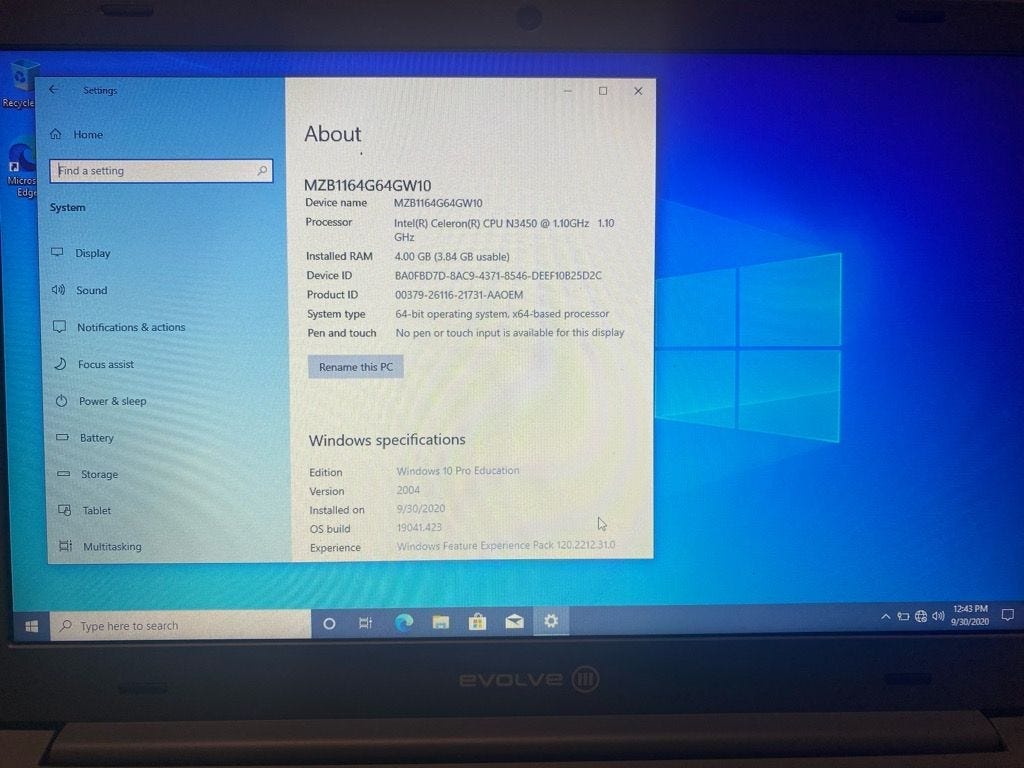
A couple of precautions before deleting your perfectly good partition and reinstalling Windows is to capture the machine info in the “About” screen, and the Windows activation key code.
To find the current Windows 10 Activation on the computer follow the instruction in the link, or open CMD and type:
wmic path softwarelicensingservice get OA3xOriginalProductKey
NOW FOR THE SCARY PART
REINSTALL FROM THE RECOVERY DISK
Now power the laptop off, insert your recovery USB and power it back on.
It should boot from the USB drive and go into the same setup procedure that you did when you first took it out of the package and booted the laptop for the first time.
MY ADVICE
Be consistent on the username and password (I don’t use a password) as restoring software config paths will be done with a .bat file or FreeFileSync script and having the username directory hard coded into it, the path will not break if you don’t change the name on subsequent installs.
C:\Users\PNWminuteman\AppData\Local\JS8Call
For example the JS8Call config files are kept in the hidden AppData directory of the username. By entering PNWminuteman as the username on installs the path will be the same each time.
AFTER YOUR FIRST RESTORATION
You are now ready to start cleaning up Windows and moving onto software installation. I’m going to describe the software and install theme on the next post, but before leaving this one, I want to address one piece of software I use for “debloating” (getting rid of software off the system we will never use) the Win10 install.
My preferred debloating software is WIN11debloat found here: https://github.com/Raphire/Win11Debloat its a script and works without breaking you Windows installation like many others I’ve tried have done.
This software and ALL others that I will be mentioning is kept on my Proton Drive for ease of finding and because this tutorial is a snapshot in time and future revisions might break the process, they are there for download if you want them. I will have a link to the drive at the bottom of each post if you want to use it or just confirm you have the same version of the software if it doesn’t seem to be working for you.
WIN11DEBLOAT
The program can run from the USB just fine, so I extract the zip on the DATA1 USB where it sits and run it from the resulting directory.
Below are the options I use and extra software I debloat other than the standard items. Start the PowerScript install by double clicking the Run.bat file in the extracted directory.
(2) custom mode
(3) selectapps
BingSearch
GamingApp
OneDrive
Outlook
People
RemoteDesktop
WindowsStore
all xbox items
YourPhone
ZuneMusic
** Go through confirmations and pay attention to them.
THINGS THAT DIDN’T WORK ON EDUCATION VERSION
I noticed after using WIN11Debloat on the Evolve iii Maestro that one thing that did not uninstall was OneDrive, I had to use ADD/REMOVE to uninstall it.
OneDrive (there are two)
MISC WINDOW SETTINGS
Some of my preferred settings, YMMV.
Clean Windows Toolbar up
Turn off news
Shorten search to icon
Unpin Mail, Edge
Unpin Cortona (it’s been removed)
Correct Mouse Direction
Touchpad > scrolling direction
Display Settings
Sleep & Power = NEVER
Screen saver = Black @ 10minutes
CONCLUSION
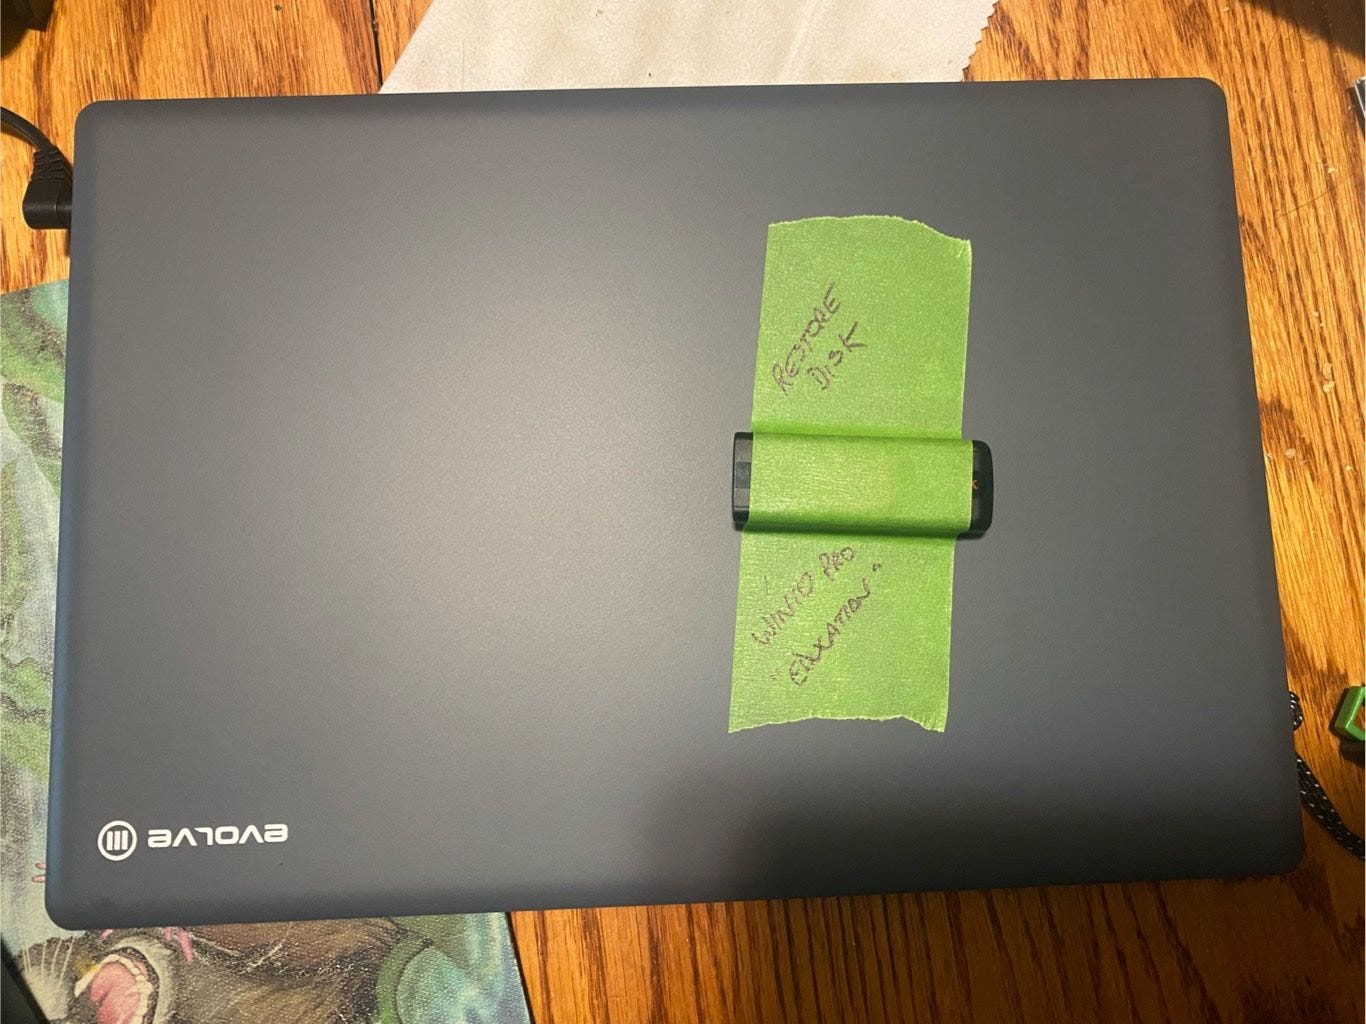
Ok, at this point, we should know how to get into the BIOS to allow booting from the USB before the hard-drive in the future, we should have a fully functional re-installed version of Windows 10 Pro Education on the laptop and we should have a restore disk to allow re-installs or corrupted Win10 installs to be repaired via our Restore USB.
I suggest tapping it to the laptop itself as shown below.
In the next segment we will create our software USBs, install the HAM Shack software, and create a backup scheme for the system while we wait for the radio to be delivered.
WHERE TO BUY THE RADIO
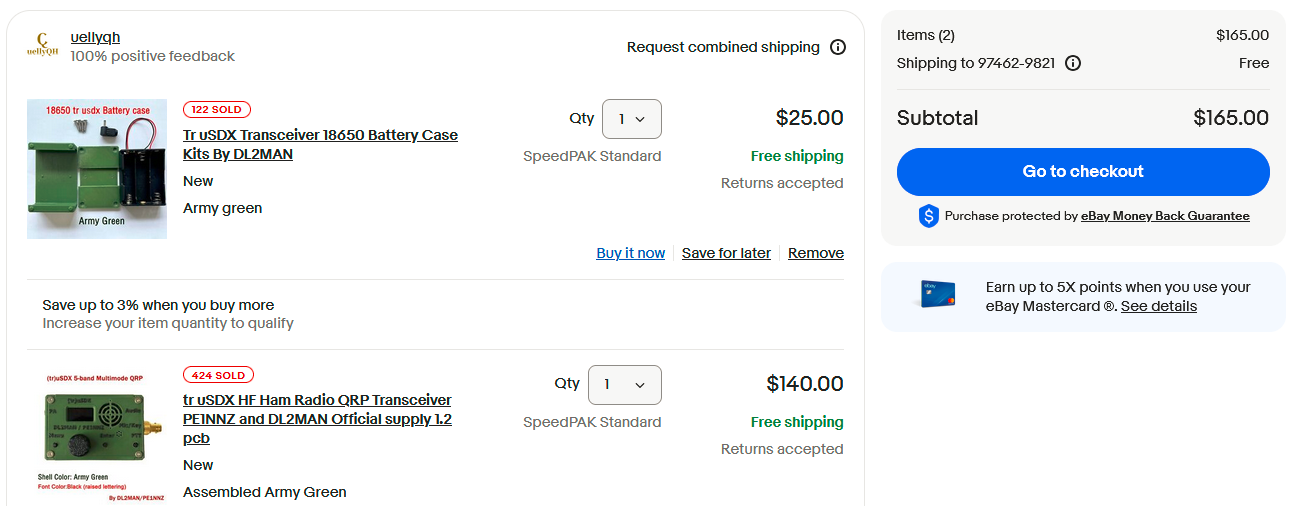
The Amazon vendor was out when I started this post, so I bought off of eBay instead.
BE ABSOLUTELY SURE to purchase ONLY from the OFFICIAL VENDOR LIST at:
As there are many fakes or poorly constructed kits out there, the official vendor list has submitted their builds to the kit maker for approval to get on the list.
ZENIER DIODE MOD
This is not an option IMO, I will be performing this mode to protect the finals on the radio immediately. Check out the how-to video below and purchase the diodes when you purchase the radio.
MY PROTON DRIVE FILES
Let me know if there is anything I need to clarify in this post in the comments, thanks for making it this far! - 73


