


THE MINUTEMAN HF MICRO KIT PART 3
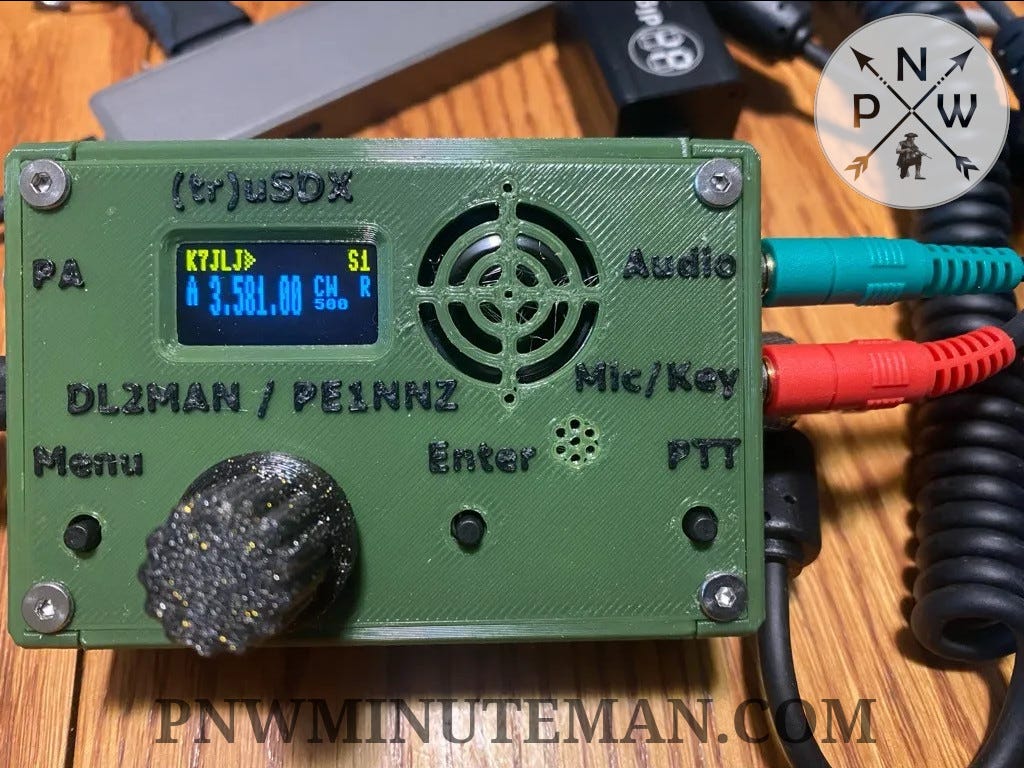
SETTING UP THE (tr)uSDX FOR THE FIRST TIME
PART 3 OF THE SERIES: THE MINUTEMAN HF MICRO KIT “A LOW COST DIGITAL SYSTEM THAT GETS THE MESSAGE THROUGH”
Ok, today is the day we fire this thing up.
FIRST THING FIRST
I HIGHLY RECOMMEND NOT USING 12VDC UNTIL FINISHED, POWER THE UNIT VIA THE 5V USB TO ENSURE THAT YOU DON’T BURN UP THE FINALS ON HIGH SWR BY ACCIDENT. ALSO CHANGE PARAMETER 2.8 Practice TO ON, THIS TURNS THE OUTPUT OFF.
LEAVE IT THIS WAY UNTIL READY TO GO ON AIR.
For the most part it’s pretty easy to setup, but I have a few “nuggets” to add that Drew @TerminalElement gave me while trying to get it up and running.
WHERE TO START
I started by going to the makers website https://dl2man.de/4-trusdx-manual/ and downloading the page as a PDF using the Print Friendly browser add-on.
I will also be making a page for the EmComms Book in the next version to allow additional information specific to my units settings to be stored along with a cheat sheet.
The website has a nice table for the controls and menu items but it is an HTML table and formatting is lost in the PDF, if you copy and paste into a “word” document it retains the formatting. I have added a one page document to my Proton Drive (trSDX_Functions.pdf) for printing if you like.
Anyway, take a look at that manual page and don’t get too wrapped up on it as some of the data is old and inaccurate. Be sure to watch the “how to use it” video from the manual page and shown below.
INACCURATE DATA
Case in point… The note that says “Firmware 2.00t and above, requires a baudrate setting of 115200” is not correct. My unit is 2.00i (setting 9.7 F/W) and used 115200 just fine to update the firmware, which is required to add you callsign.
“Digital modes without Audio Cables” section should be ignored as this method is not as reliable as using a Digirig which what we are doing here.
FIRMWARE UPDATE (ADDING CALLSIGN)
You do not need to use a callsign to update the firmware, but if you want to use the CW CQ function, it needs your callsign to run the script.
The first thing we need to do is update the firmware and install our callsign.
Following the page below is straight forward and I had no issues at all updating the radio from the instructions found on it.
https://dl2man.de/3b-trusdx-firmware/
This will install 2.00i (current stable release) as your firmware. I’m not a BETA guy so “you do you” if you feel froggy.
https://dl2man.de/wp-content/uploads/2022/01/wp.php/beta.html
From the firmware page you need to get the driver needed for CAT control, so be sure to save the install file on your DATA backup USB under drivers.
Firmware updates erase important settings. Before uploading a new firmware it is recommended to write down any changed settings, and re-applying them after installing the new firmware.
Once the firmware is installed, if you are not connected to a dummy load, you should go in and turn 2.8 Practice back to ON to prevent accidental output of the unit.
If you have a dummy load connected to the radio at all times this is not needed. Before the Z-diode mod is done though, you stand the risk of burning your finals up on a HIGH SWR mismatch, ie. no antenna connected and full power is outputting.
MY PREFERRED SETTINGS
For the most part I did not change much from the defaults.
Volume = +6 (volume is how we control how loud the signal comes into JS8Call)
1.12 S-meter = “S”
8.2 PA Bias max (lowering this setting will lower your output, but is best left alone) = DEFAULT (128)
8.3 Ref freg = 26997600 (default = 27000000) yours will be different.
SETTING UP JS8CALL (WITHOUT CAT CONTROL)
Normally I would use FLRig to control my radio via CAT to allow many programs to use it at once, but I found out the hard way while setting up the (tr)uSDX that not all USB cables can transfer data. All the cables I had on hand were only good for supplying power, so I continued on without CAT control.
I have since ordered the following cables for future use as CAT control of the (tr)uSDX. You need only one.
I will be adding CAT control instructions to a later post once the cables get here. I chose to make this post without waiting because it can become confusing looking at two drivers during setup.
ESTABLISHING COM PORT SETTINGS
Before even opening JS8Call, we need to setup Windows to see the DigiRig and establish the MIC/SPKR settings to use with the radio as well as install the proper drivers if not already done as show in the previous Part 2 post.
With the radio connected by USB (no 12vdc power yet) we should see our callsign on power up, connect the DigiRig cable as shown and under DEVICE MANAGER we should see the DigiRig driver installed in Part 2 and check that it is set for 115200baud.
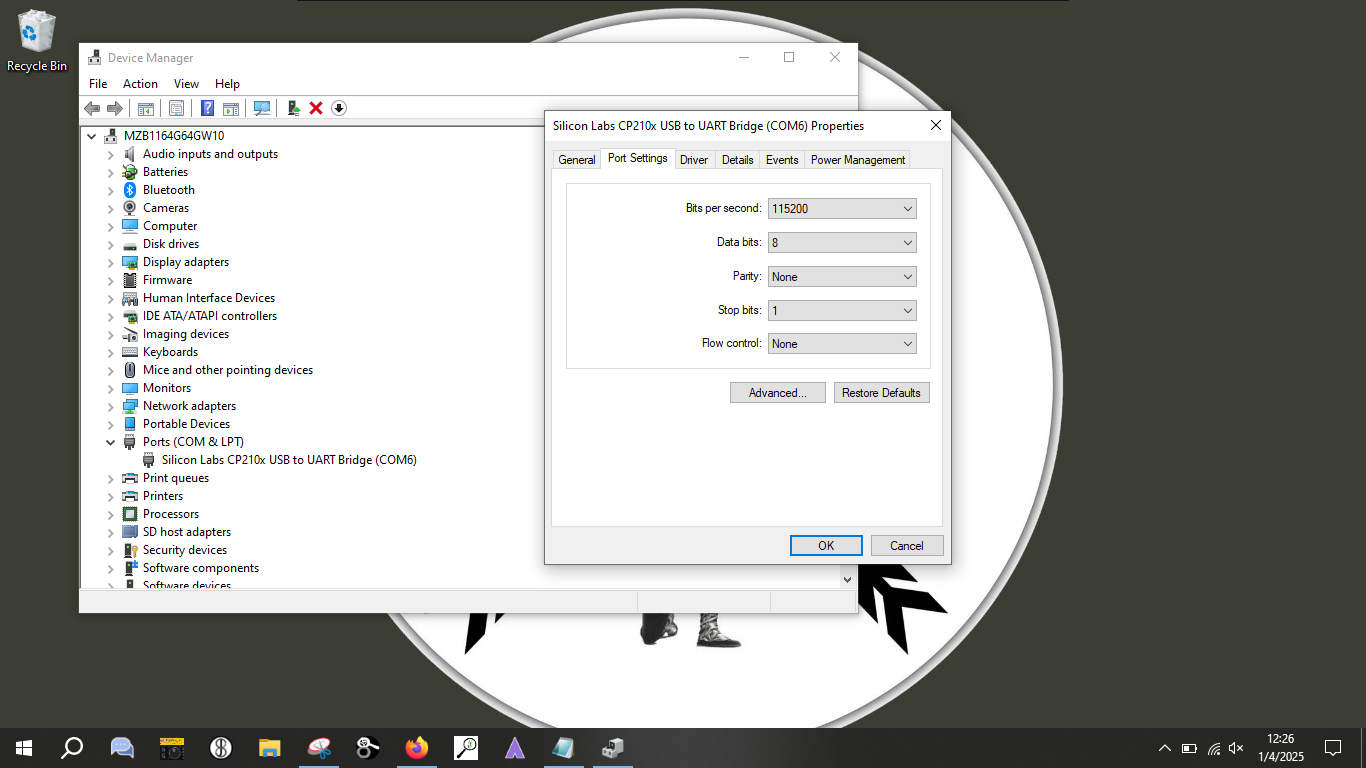
In your search box if you type DEVICE, you will see the Device Manager in the results which when opened you will see the CP210x driver we installed in Part 2 is assigned to COM6 when we plugged in the USB cord (yours will likely vary depending on the port used) and right clicking on the port will give properties of which we want to change the baud rate to 115200.
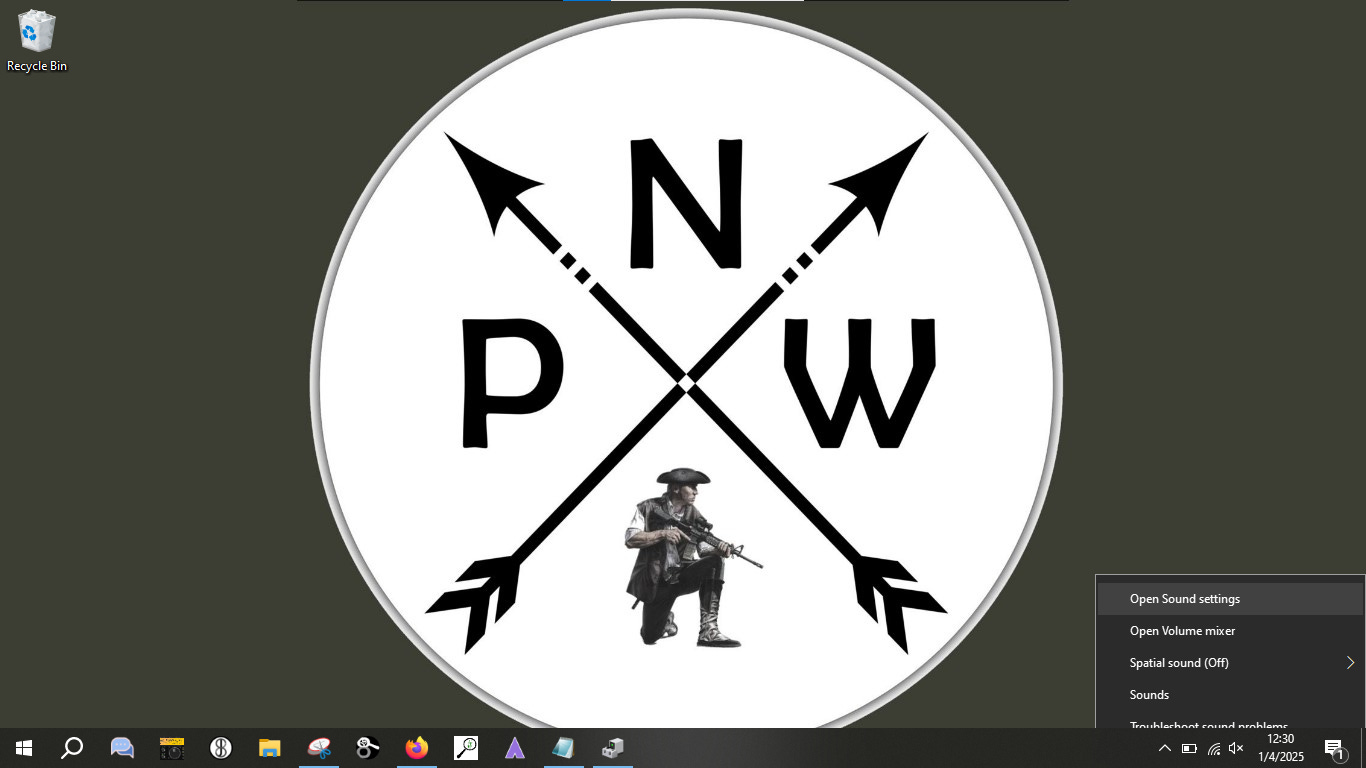
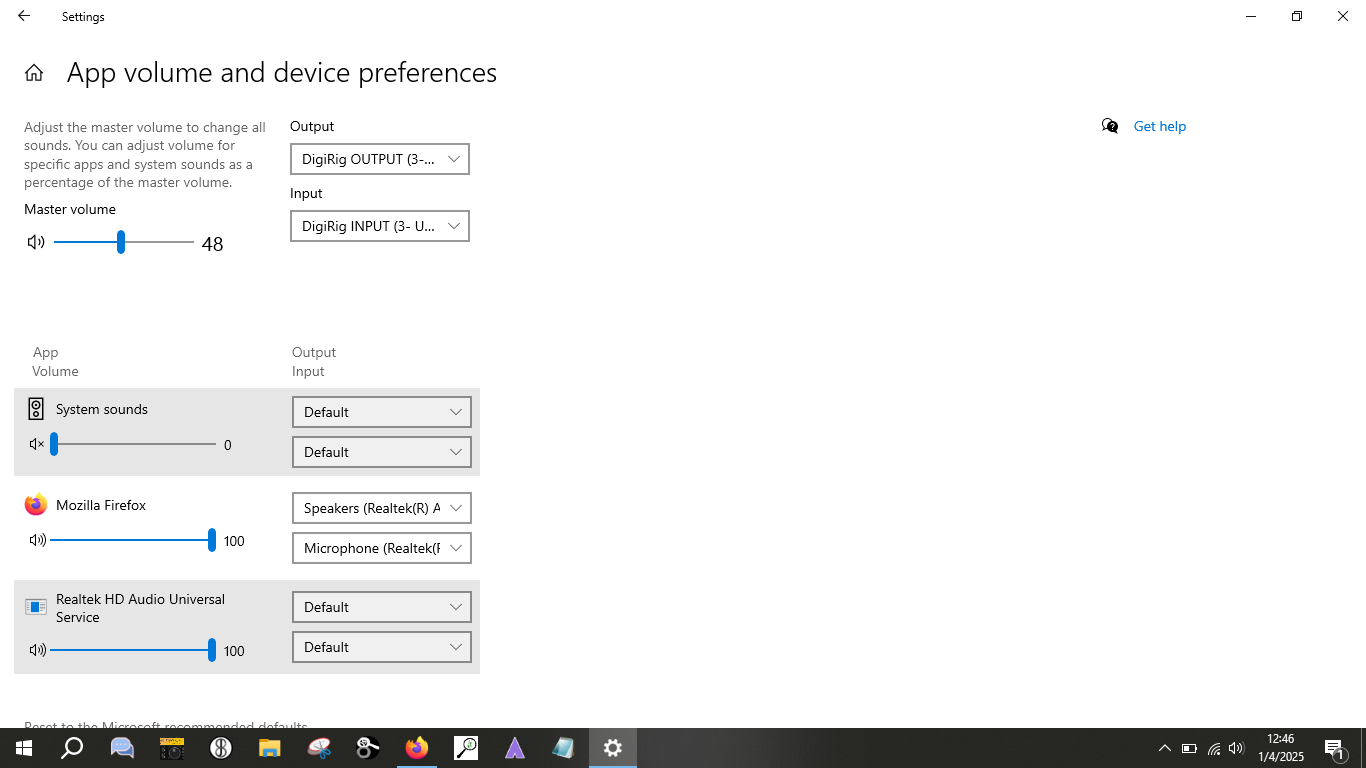
Right click on the speaker to get to the sound settings below.
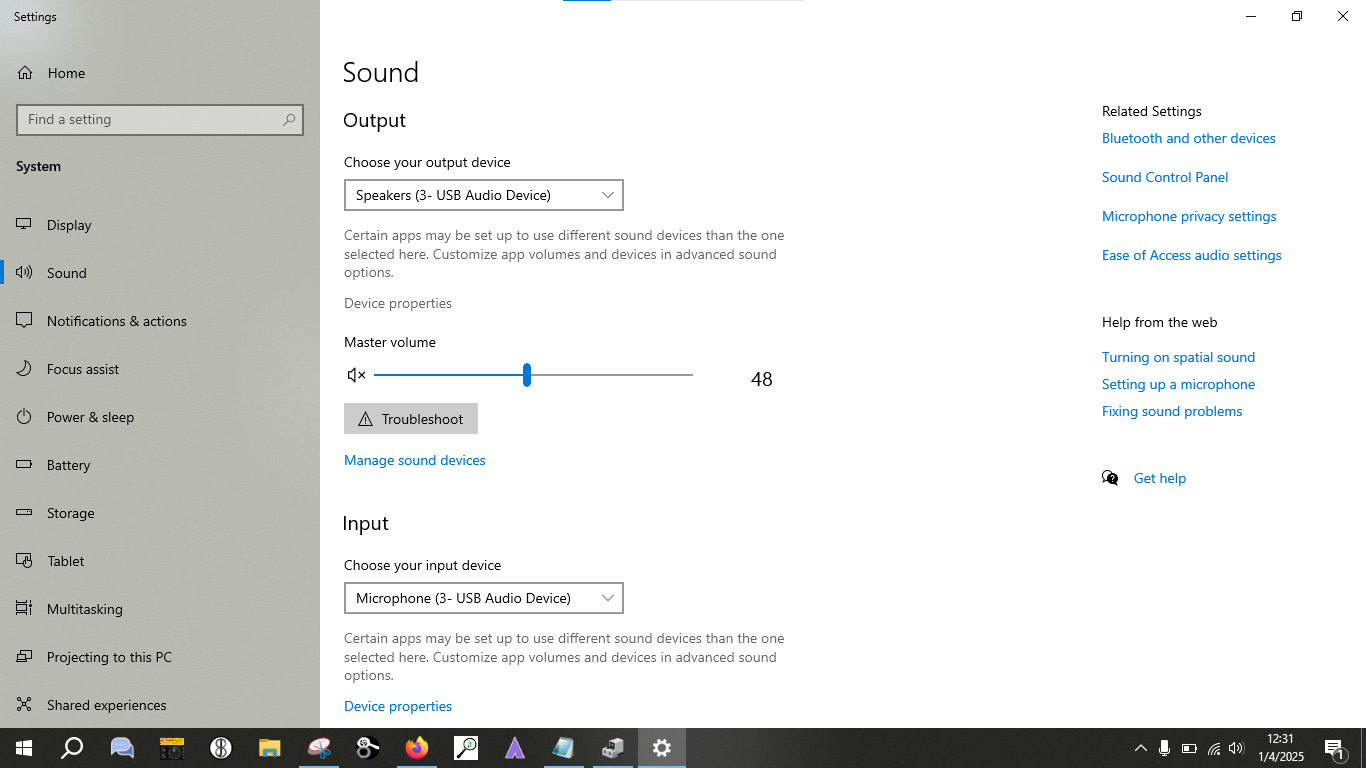
Select the output that is associated with the USB Audio Device, rename to DigiRig OUTPUT for clarity.

I change the default icon also to a modem.
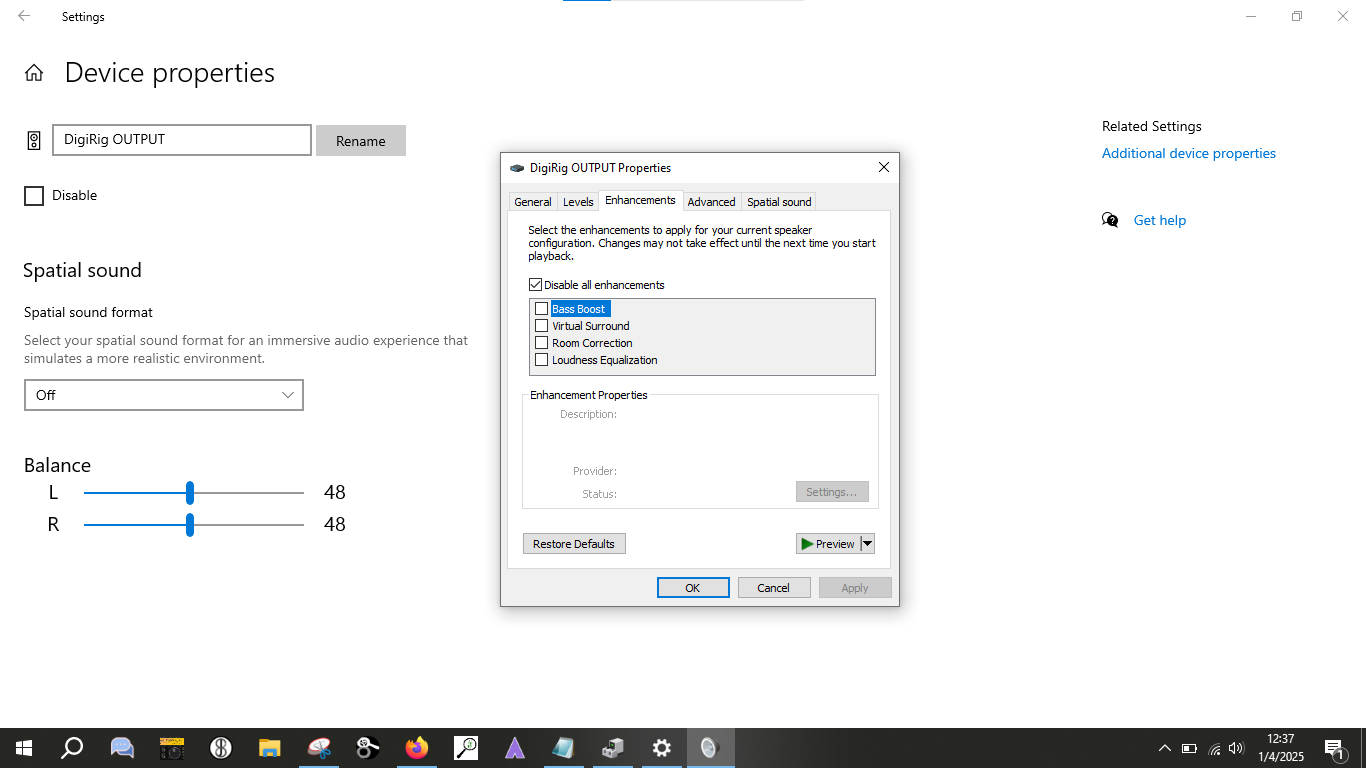
Turn off enhancements.
INPUT DEVICE
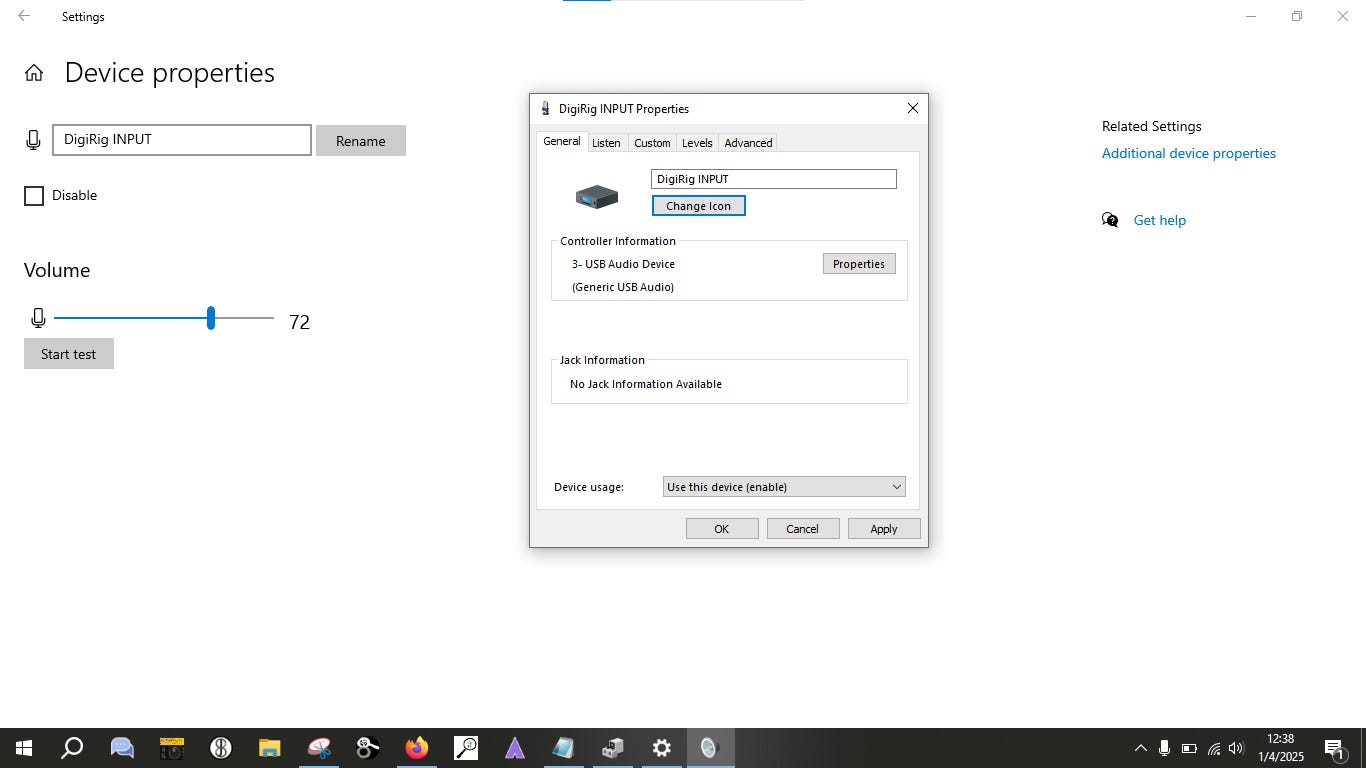
Rename the device.
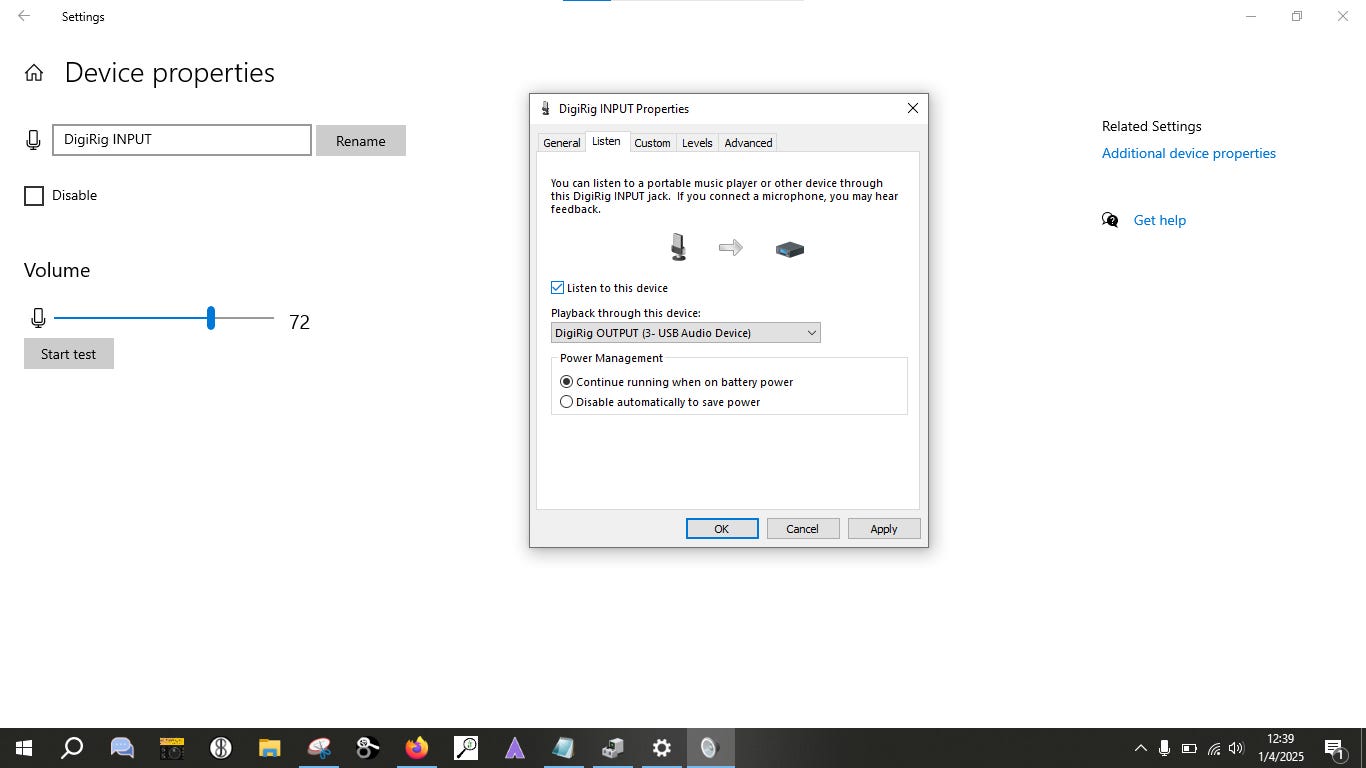
The (tr)uSDX does not allow audio to be heard when plugged into the DigiRig, but this setting allows you to hear through the laptop speakers if checked.
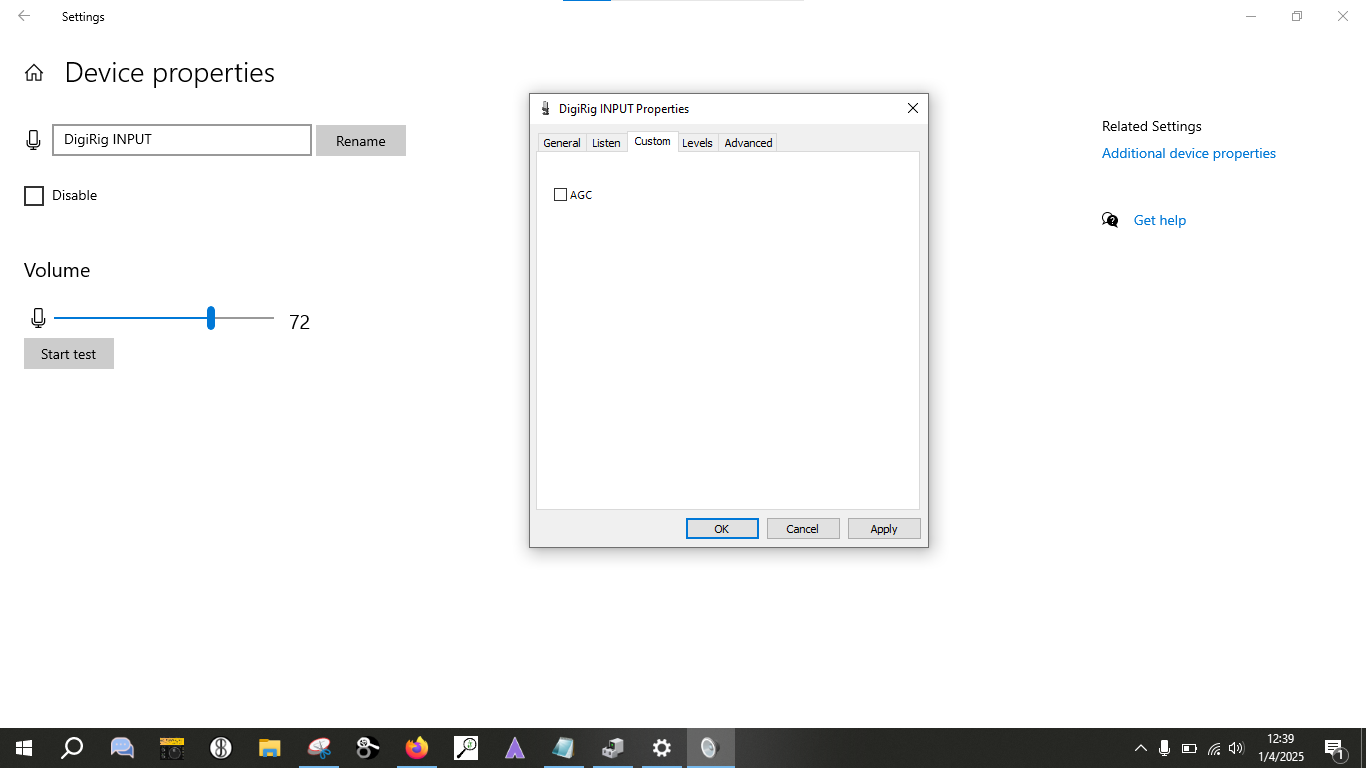
Turn off AGC by unchecking this box. This setting can be turned back on after a windows update so keep an eye on it.

Open advanced options
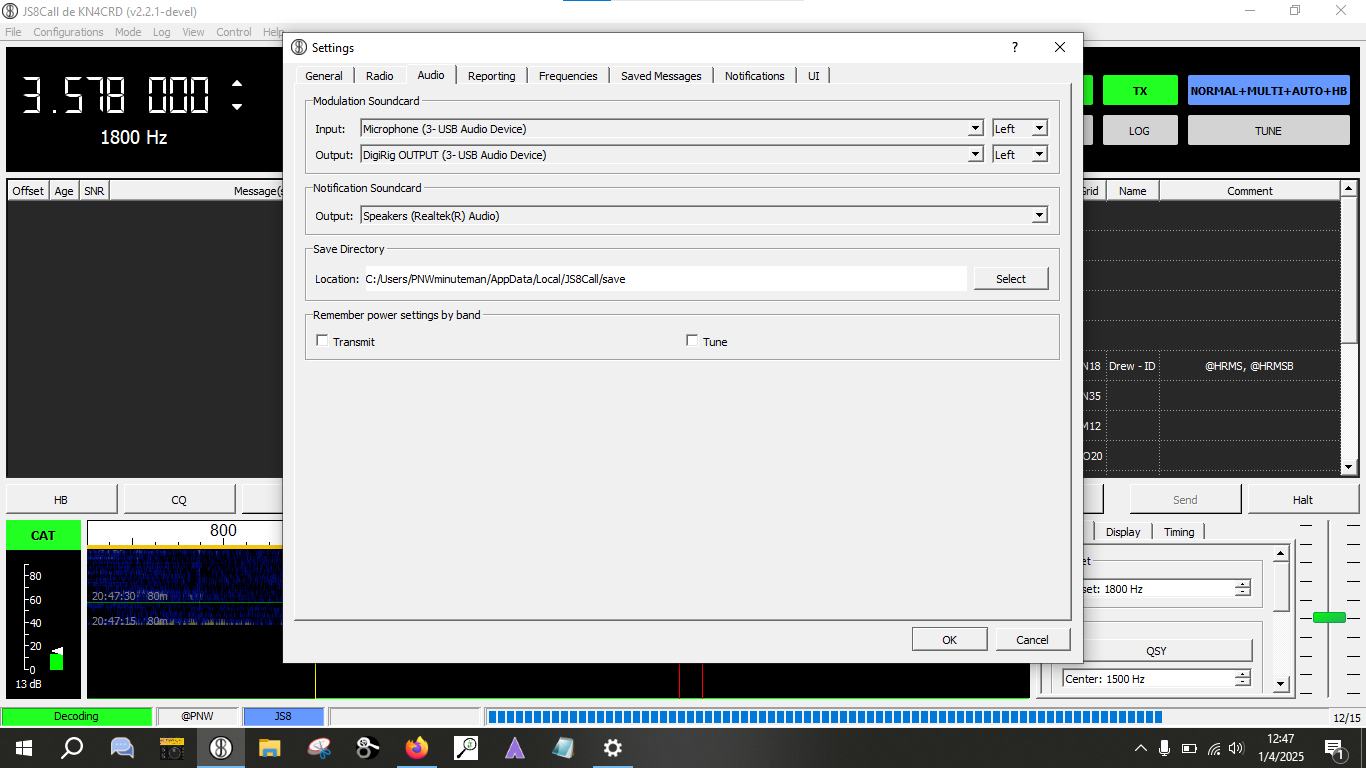
Opening the js8call program will populate the advanced window as shown below.
I assign the DigiRig to the app, it is set to default by default. ;-)
JS8CALL SETTINGS
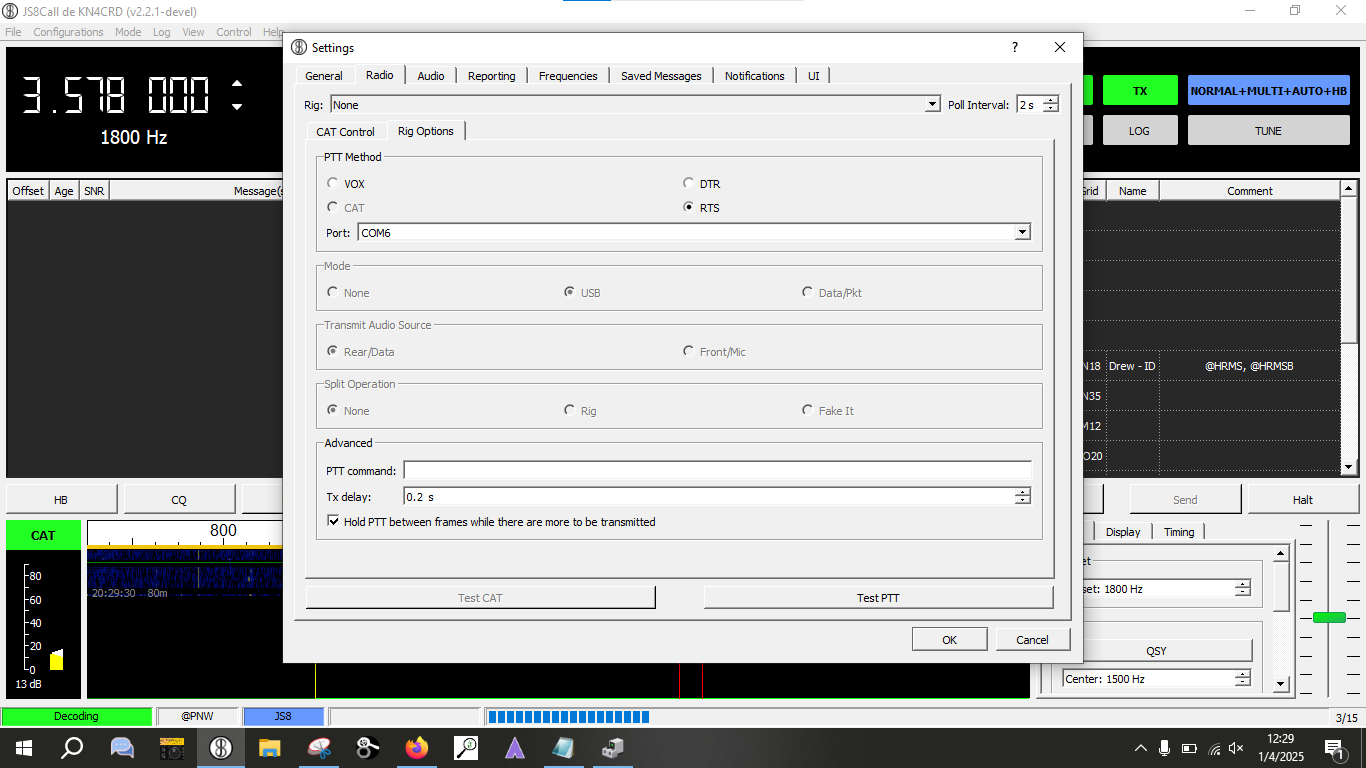
Opening JS8Call settings we are going to use the following for a non-CAT setup, which means you have to change the frequency and modes manually on the radio. Note the control is RTS.
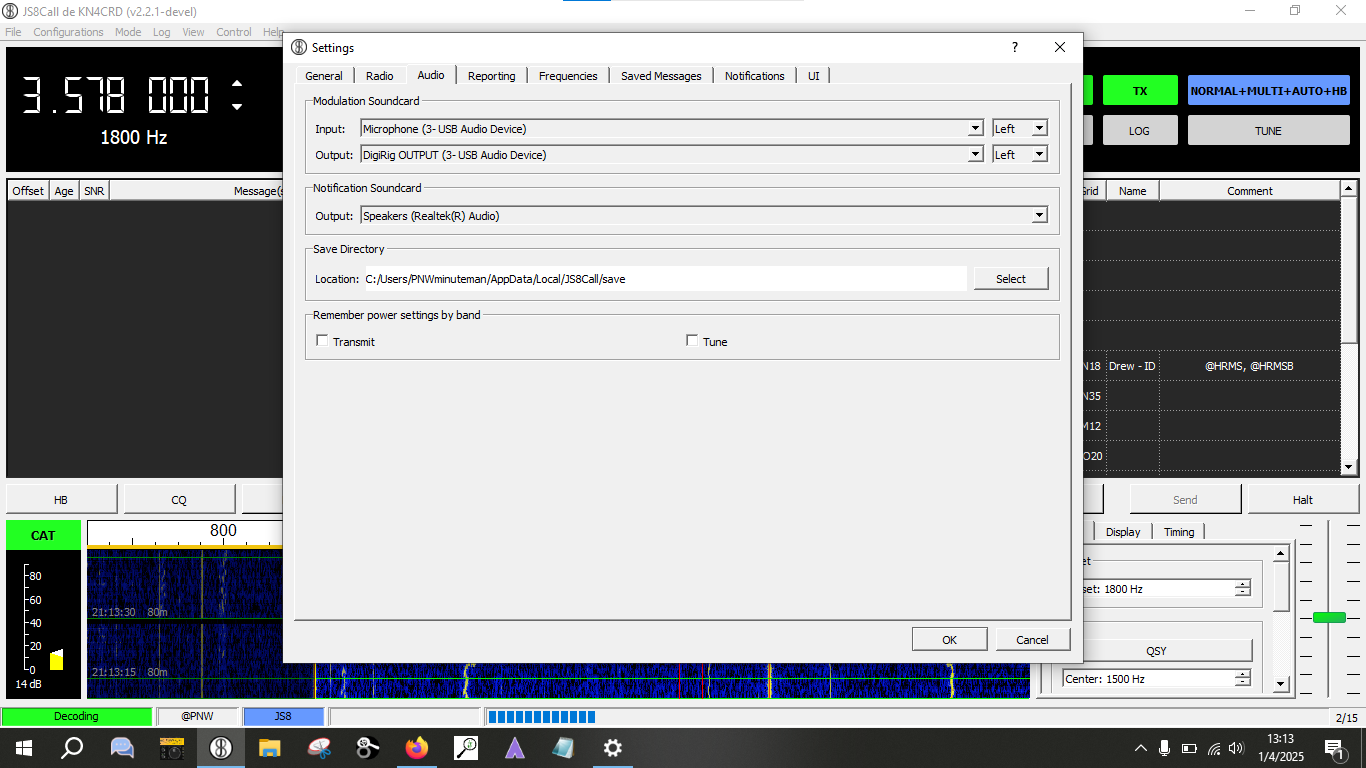
Don’t ask me why JS8Call only sees the renamed OUTPUT and not INPUT.
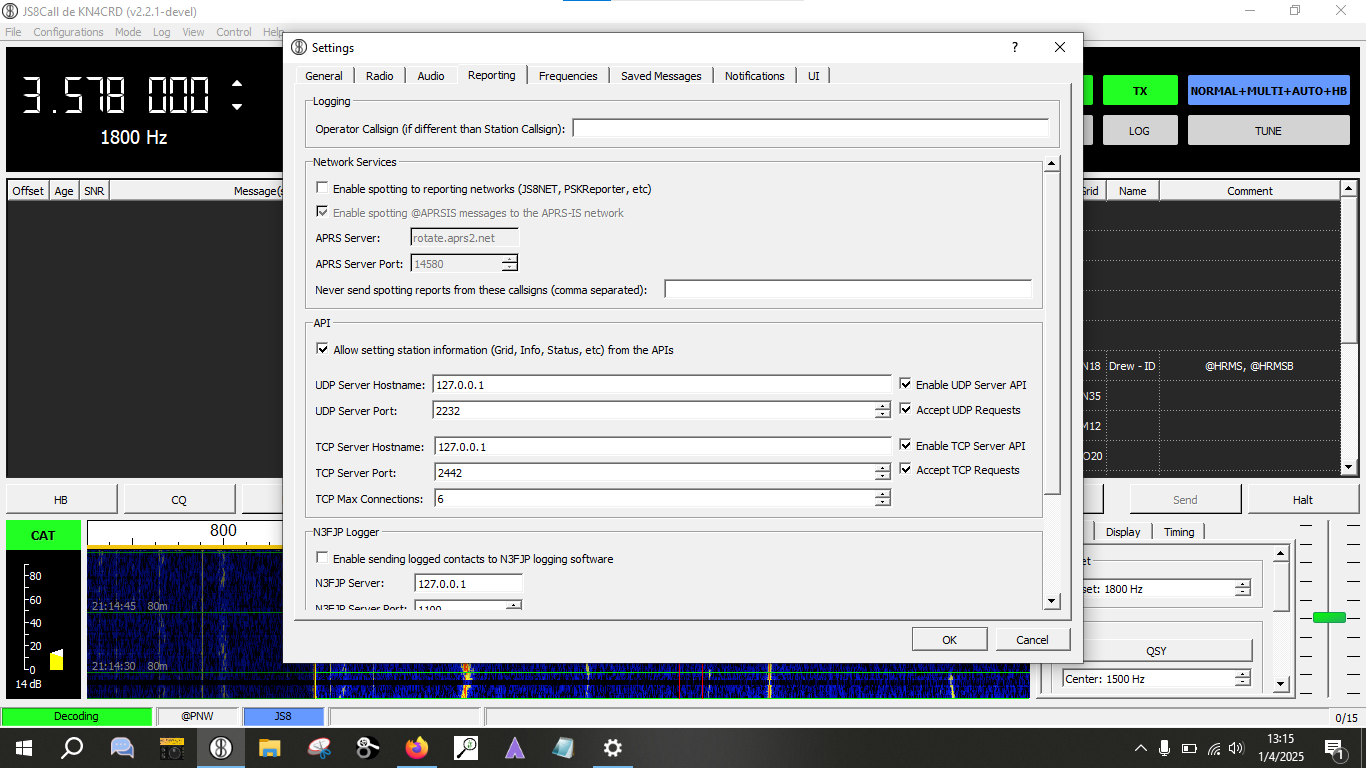
Setup for JS8Spotter to get information from JS8Call.
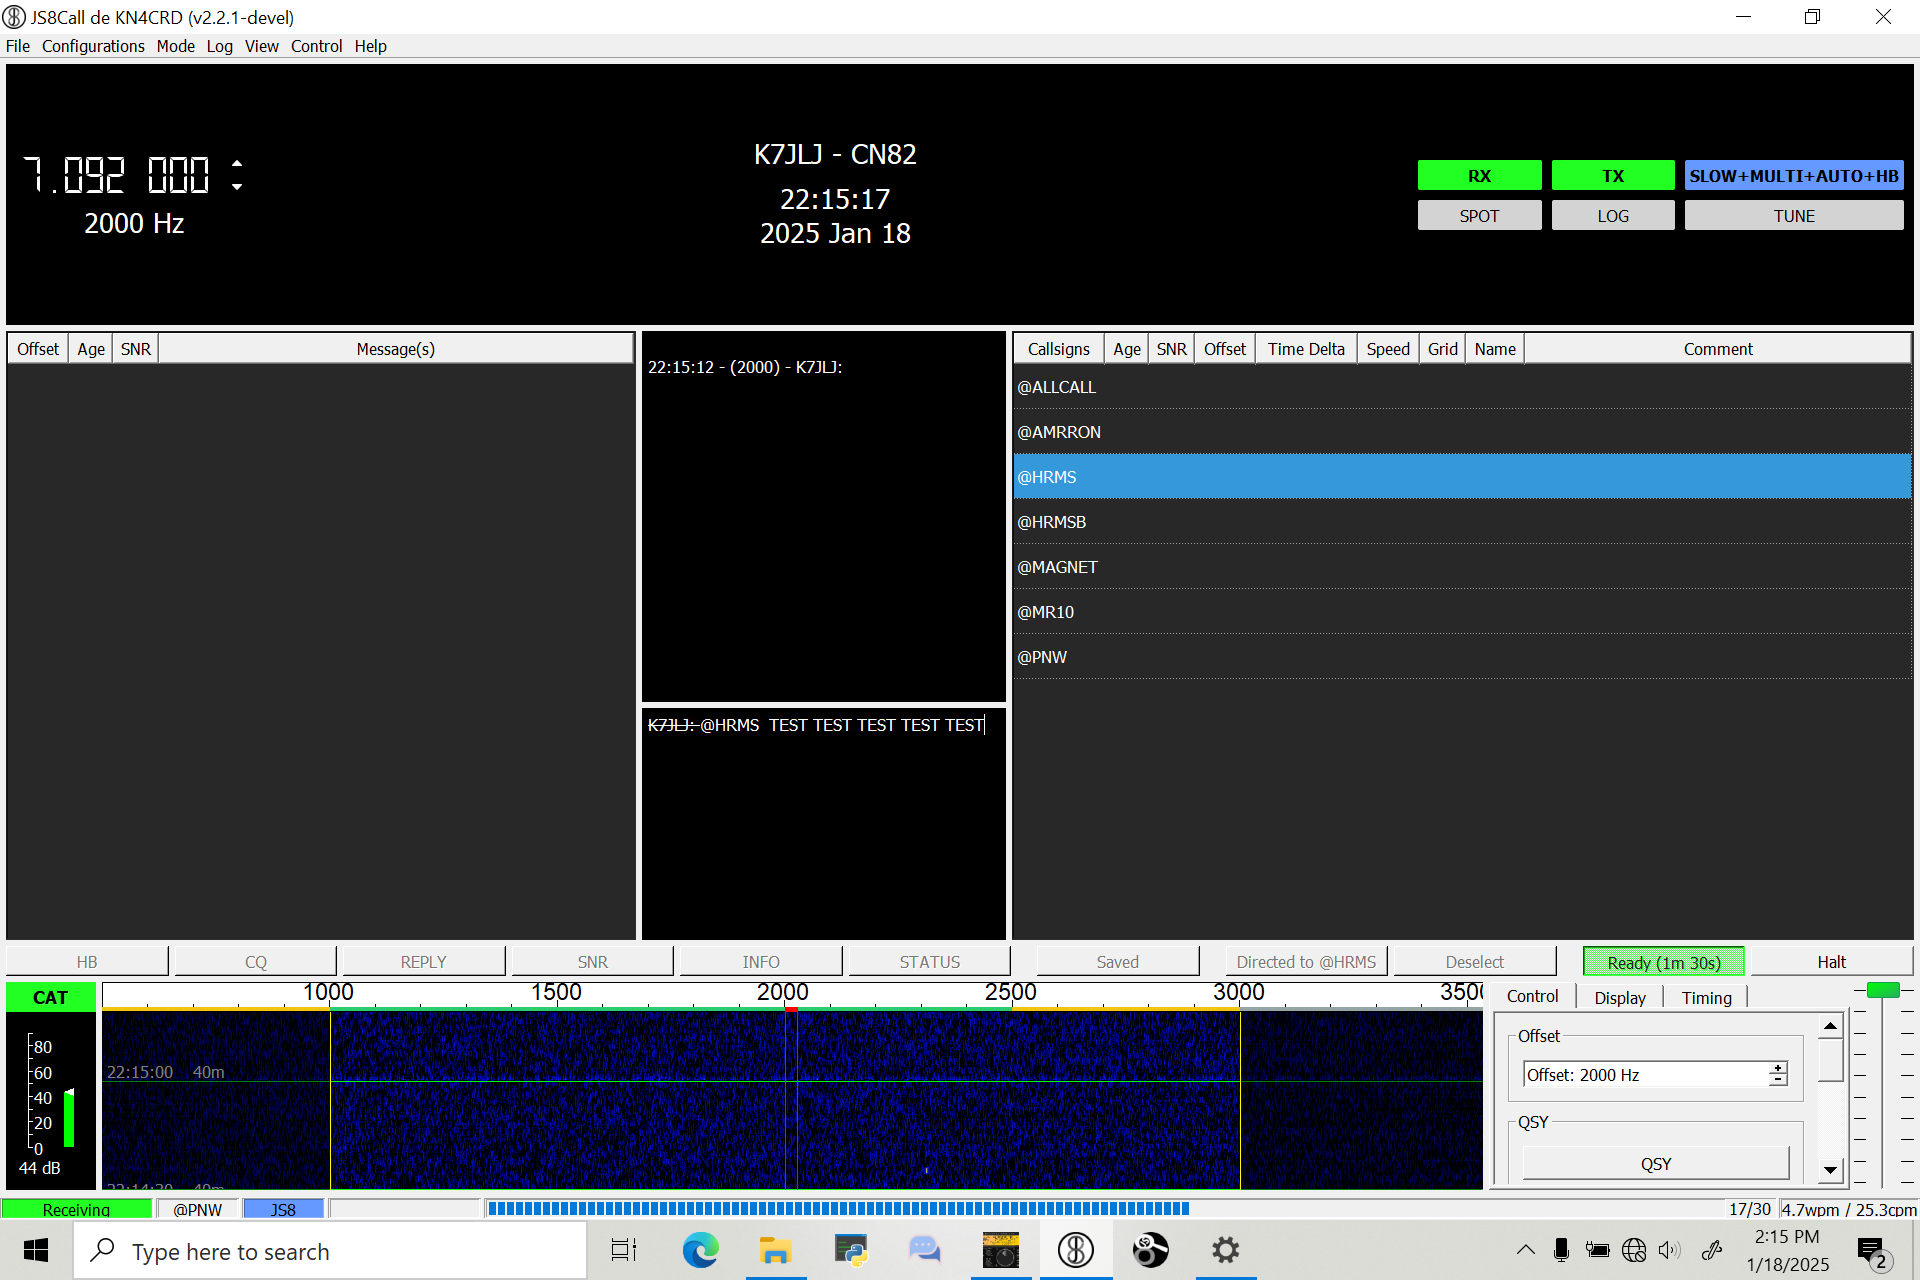
TESTING TRANSMIT
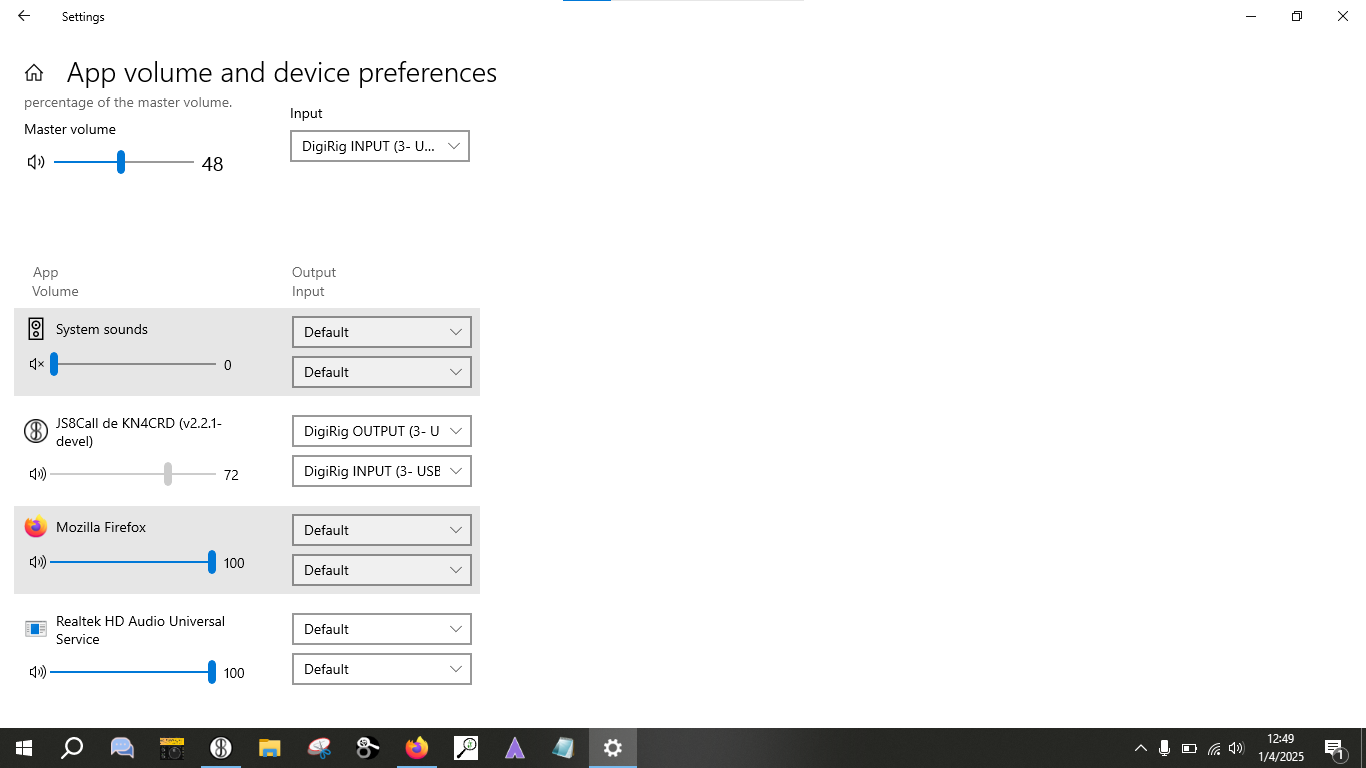
At this point the rig is setup to PRACTICE MODE so it will not output power but we should have control via JS8Call if your settings match the above.
Turning on the tune in JS8Call should give an “output” as shown below.
LET ER BUCK!
Now we are finally ready to get on the air!
A bit of caution is to make sure you have a resonant antenna or one that is tuned to keep the SWR down.
Also, the 12v power supply is a POS (+) tipped connection, I do not know if the radio has reverse polarization protection, so test twice before plugging it in.

I used an old manual MFJ-941E tuner that shows forward/reflected but the (tr)uSDX has a built in SWR meter that works under CW only, which is all you really want as it will send a full carrier with the PTT button instead of a modulated “whistle” on SSB.
With the PRACTICE MODE on in 2.8, and the radio in CW mode, when you push the PTT button on the radio you will see the top of the screen depict 0.00W our and SWR show nan or 9.99.
Now connect it to your TUNED antenna (most auto tuners will not work with 5W output so a manual tuner or resonant antenna is recommended.
Demo below of manual tuning and transmitting with JS8Call.
Congratulations, you are on the air!
CALIBRATION
If you don’t have a second radio as the demo above, you can do the same by having a friend or willing stranger to tell you were you are on the WF while you make small adjustment until your output is matched to the WF.
You can also use an online SDR site like: http://websdr1.sdrutah.org:8901/index1a.html to check your alignment by sending (slow = narrow) a signal and adjusting until your output lands on the dot. In the example below I am sending on FREQ: 7.092 @ 2000 on the WF (waterfall) and because I have adjusted MENU 3.8 up/dn already, you can see the signal is received at exactly on the waterfall at the 2000 offset which is the same as:
7.092MHz + 2000Hz = 7.094MHz or 7094KHz
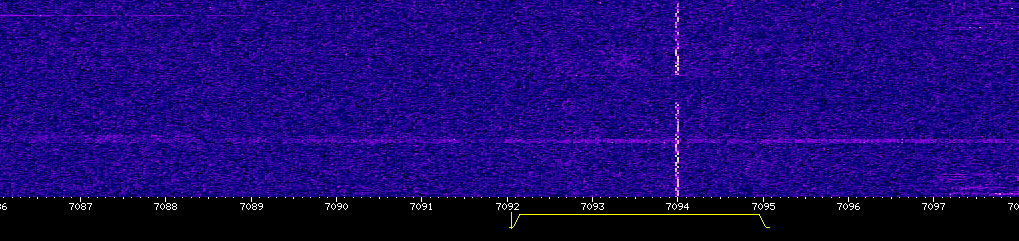
The clean narrow signal you see WITHOUT splatter is because your not over driving your output and your transmitter is stable, an unstable (poor transmitter) will look like a waving line here. To check your setup for overdrive, I suggest watching Drew’s quick video below.
NEXT UP
We will cover CAT control and the Z-diode protection mod and the add on battery pack build.
Ask your questions below please. -73
A fine article. I've had the same issue with the sound card names not updating right away in JS8, and the issue corrected itself a restart or two later.
Another way to calibrate is if you can get connected to a VARA Winlink gateway. If the AFC needle shows too far to the left, enter menu 8.3 Ref Freq and twist the knob clockwise. Counterclockwise if the AFC needle is too far right.
Q, you belong to AMRRON or EWN?